NOTA : MAKLUMAT YANG DI ISI TIDAK AKAN DISIMPAN
Note. Android
Thursday, 10 December 2020
Wednesday, 13 July 2016
How to root Samsung Galaxy Note 3 (9005) Lollipop 5.0
Untuk En. Det.
1. Download file ni. CF Auto Root Note 3 9005
extract dan dalam file tu ada ni :
dah ada Odin dalam tu. Odin utk Note 3.
2. Aku assume hang pakai windows 10. jadi step 2 ni hang abaikan.
3. Now enable "USB debugging mode" on your Samsung Galaxy Note 3 SM-N900 or SM-N9005 from Settings->Developer Options->USB Debugging.
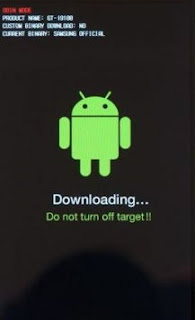
4. setkan note 3 hang ke download mode. Off henpon. tekan vol down + power button. sampai henpon hang keluaq gini.
dapat skrin mcm ni, tekan vol up utk teruskan. dan hang akan dapat skrin mcm ni pulak.
1. Download file ni. CF Auto Root Note 3 9005
extract dan dalam file tu ada ni :
2. Aku assume hang pakai windows 10. jadi step 2 ni hang abaikan.
3. Now enable "USB debugging mode" on your Samsung Galaxy Note 3 SM-N900 or SM-N9005 from Settings->Developer Options->USB Debugging.
4. setkan note 3 hang ke download mode. Off henpon. tekan vol down + power button. sampai henpon hang keluaq gini.
dapat skrin mcm ni, tekan vol up utk teruskan. dan hang akan dapat skrin mcm ni pulak.
5. berbalik ke laptop hang. bukak odin. seeloknya right click dan run as administrator.
6. sambung henpon hang dgn pc. bagi masa sat utk depa communicate.
sampai la ID:COM hang tu jadi kala biru ginii...
7. klik PDA button. select file CF-Auto-root.md5.tar dlm folder yg hang download dan extract td.
Please make sure that “Auto Reboot” and “F. Reset Time” options are only check marked in the Odin.
8. Klik start. sit back n relax.
Monday, 3 March 2014
Wednesday, 21 August 2013
Wednesday, 26 June 2013
Fastest 4.1.2 ROM on XDA [N7000]
SuperBean 1.4.1 XXLT4
Download ROM SuperBean 1.4.1 here / here (zip)
Download PhilZ kernel XXLT4 v5.00.5 here / here (zip)
1. Copy both files to your SDcard.
2. Reboot into recovery mode (vol up+home+power)
3. Full wipe (data/cache/dalvik) with any latest PhilZ kernel.
4. Mount and storage.
5. Format /system /data /preload.
6. Format /emmc (WARNING! this step will erase entire phone memory! Super clean ROM you'll get)
7. Install zip. (ROM)
8. Wait until finished.
9. If you want to gained your root back, install PhilZ kernel XXLT4 v5.00.5. (do not use others, you may loss root or double superuser app)
10. Reboot.
Screenshot
Friday, 31 May 2013
Download video from Facebook android apps.
1. Download ES File Explorer File Manager from Playstore. It's FREE
2. Open Facebook apps and find any video.
2. Open Facebook apps and find any video.
Tuesday, 28 May 2013
Ubuntu Theme - UCCW skin.
Tired of your old fashion homescreen? try this one.
Step by step installation :
1. Download Apex Launcher from Google Play. make it default launcher. 5 screens.
2. Go to Apex settings-Homescreen settings. Set the portrait grid to 8x5 ; Horizontal and Vertical margin = None
3. Go to Apex settings-Advanced settings-Checked Overlapping widgets
4. Download Ultimate Custom Widget (UCCW) from Google Play. it's FREE
5. Download and install Ubuntu Theme Pack - Here
FIRST screen.
1. Place a UCCW widget of 5x2 size at the top of the first screen. This will open the skins list.
2. Tap on "Ubuntu2-Home" skin and it'll be applied to the widget.
3. Place 10 frequently used app icons below this.
4. Place two more 5x2 size uccw skins on the first screen. Skins are Ubuntu2-Calendar, Ubuntu2-Notification.
5. Screen 1 is now complete.
SECOND screen
1. Place a UCCW widget of 5x2 size at the top of the first screen. Skin name is "Ubuntu2-Social".
2. Place 10 social app icons below this.
3. Place a 5x1 size uccw skin here now. Skin name "Ubuntu2-Contacts".
5. Long press Homescreen > Shortcuts > Contact > Select the contact. Place 10 contacts in this way.
Screen 2 is now complete.
Note : Icons is from Apex launcher theme.
Subscribe to:
Posts (Atom)


